 Jeedeson Official Website
How to Use Epoxy Resin Tile Grout for Vinyl Sheet Flooring (Step-by-Step Guide)
1. Surface Preparation
Clean the tile surface thoroughly before application. Remove all dust, debris and existing grout residue from the joints using a grout removal tool or stiff brush. Ensure the gaps are completely dry and free from moisture. Wipe the surface with a damp sponge and let it dry completely.
2. Mixing the Epoxy Grout
Wear protective gloves and work in a well-ventilated area. Mix component A (epoxy resin) and component B (hardener) in the exact ratio specified by the manufacturer (typically 1:1). Stir slowly but thoroughly for 2-3 minutes until achieving a uniform color and consistency. Let the mixture rest for 5-10 minutes before application.
3. Application Process
Using a rubber grout float or squeegee, apply the mixed epoxy grout diagonally across the tiles, forcing it into the joints. Work in small sections (about 1m² at a time). Hold the float at a 45° angle to ensure complete filling of joints without leaving air pockets.
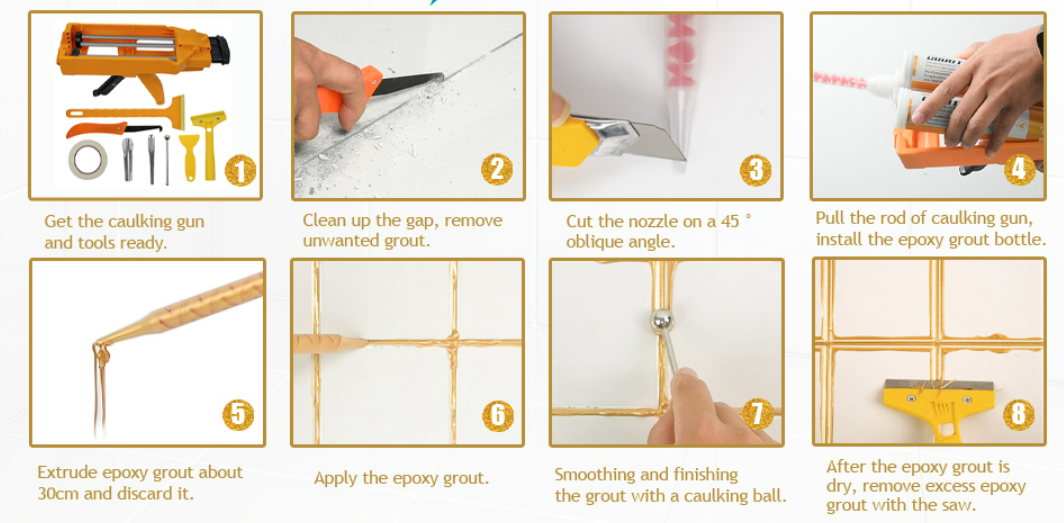
4. Removing Excess Grout
After 10-15 minutes (when grout begins to set but is still pliable), use a damp (not wet) sponge to gently wipe off excess grout from tile surfaces. Rinse the sponge frequently and wring it well. Make circular motions while cleaning to avoid pulling grout from joints.
5. Final Cleaning & Curing
Once the grout has hardened (after about 1 hour), perform a final cleaning with a dry microfiber cloth. Allow the grout to cure completely for 24-48 hours before exposing it to water or heavy use. Maintain room temperature between 15-30°C during curing.
Important Safety Notes:
• Always wear nitrile gloves and eye protection • Work in well-ventilated areas • Clean tools immediately with acetone before grout hardens • Do not apply in temperatures below 10°C or above 35°C • Keep away from children and pets during application