 Jeedeson Official Website
Detailed Operation Guide for Vinyl Flooring Roll Full Adhesive Installation Method
1、 Applicable scenarios and material selection Applicable scenarios:
High traffic commercial areas (shopping malls, hospitals) and places that require long-term stability. Not suitable for environments with large temperature differences and unstable humidity (such as uncontrolled garages). Recommended Vinyl Flooring Roll parameters: Thickness: ≥ 1.4mm (enhanced durability). Wear resistant layer: ≥ 0.3mm (to prevent scratches).
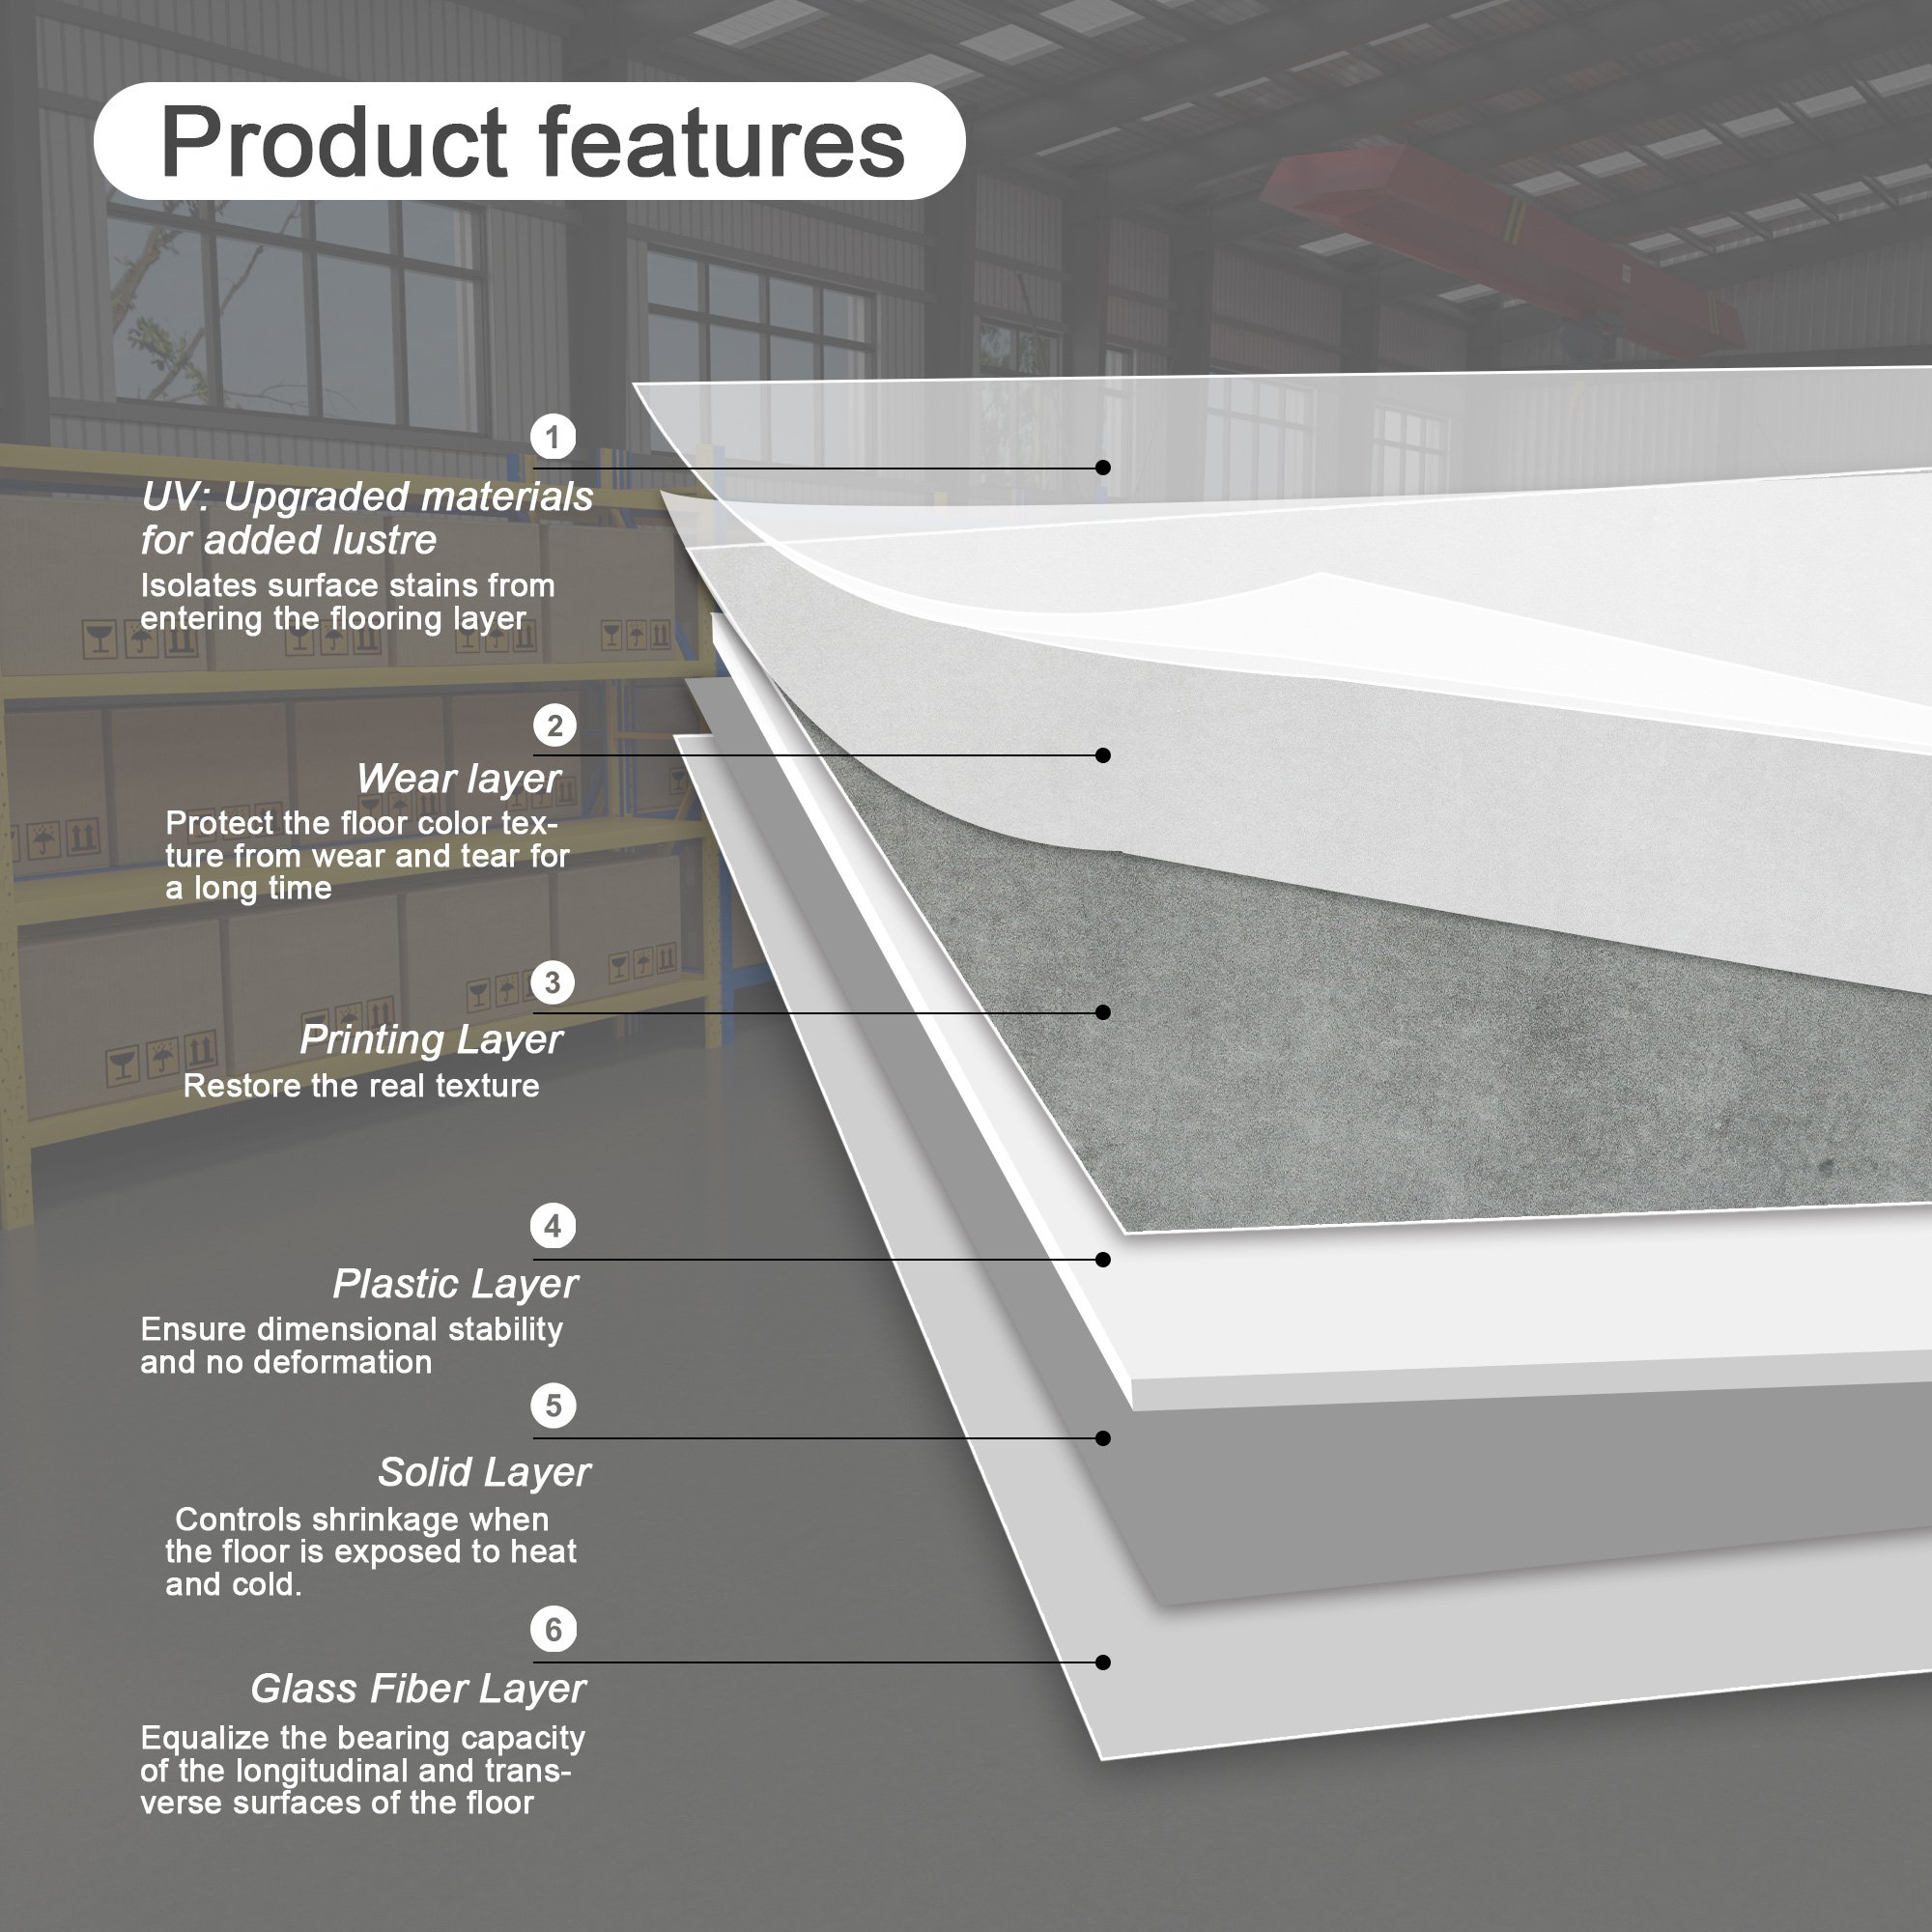
2、 Preparation before construction Grassroots processing requirements: Flatness:The ground height difference is ≤ 3mm/3m. If it exceeds the tolerance, self leveling cement should be used for leveling.
Drying degree: The moisture content of the concrete base is ≤ 4% (can be detected by a hygrometer).
Cleanliness: Thoroughly remove dust and oil stains, and use an industrial vacuum cleaner if necessary.
Environmental conditions: Temperature: 15-30 ℃, to avoid poor curing of glue caused by low temperature.
Humidity: ≤ 65%, to prevent a decrease in adhesive viscosity.

3、 Detailed steps for fully bonded installation
1)Ground pre-treatment and moisture prevention
Apply water-based moisture-proof primer (such as MAPEI Primer L) to enhance the sealing of the base layer.
Lay moisture-proof film (thickness ≥ 0.2mm), overlap the joints by 10cm and seal with tape.
2)Adhesive selection and coating Adhesive type:
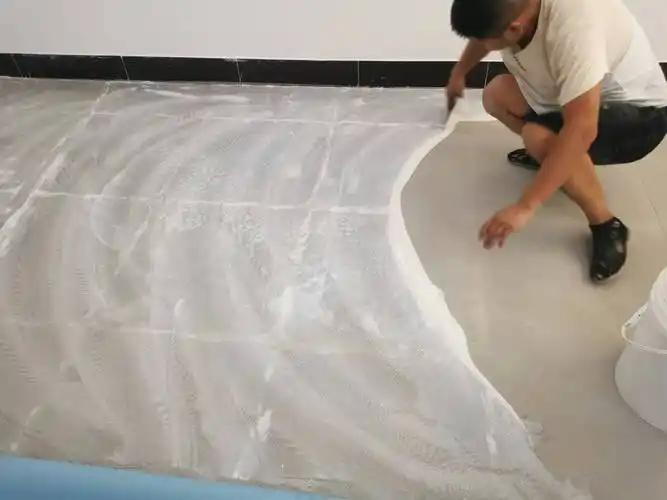
water-based vinyl polymer adhesive (such as SikaTuck Panel), environmentally friendly and highly adhesive.
Coating method: Use a serrated scraper (with a serrated height of 3-4mm) to evenly apply the adhesive.
Glue coverage rate: ≥ 85% (refer to the glue packaging instructions).
Opening time: Control according to the type of glue (usually 10-30 minutes) to avoid premature drying.
 |
 |
3)Roll laying and exhaust Positioning:
Lay from the long side of the room, leaving a margin of 5-8cm at the edge.
Unfolding technique: Two people collaborate to roll the roll in reverse to avoid wrinkles.
Exhaust operation:
Use a 50kg steel pressure roller to push from the center to both sides to eliminate bubbles.
Focus on handling the joints to ensure there are no gaps.
4)Seam treatment and cutting
Hot welding splicing:
Heat the joint with a professional hot air welding gun (such as Leister VARIMAT V2) until the PVC melts.
Fill with welding rods of the same color, cool and level the surface.
Edge cutting:
Reserve 8-10mm expansion joints along the wall and cut them with a hook knife or electric marble saw.
5)Curing and post maintenance Curing time:
Do not step on it within 24 hours, and carry out heavy object handling after 72 hours.
Cleaning advice: Use neutral cleaning agents (such as Bona Hardwood Floor Cleaner) for regular maintenance.
4、 List of Tools and Accessories
| Category | recommendation tool | material function description |
| Cutting tools | OLFA heavy-duty hook knife and marble | Accurately cutting the edge of the coil material |
| Adhesive tools | Sawtooth scraper (3mm tooth height) | Apply glue evenly |
| Laying tools | 50kg steel pressure roller, rubber hammer | Exhaust, adjust flatness |
| auxiliary materials | Water based moisture-proof primer, same color welding rod | Moisture proofing and seam beautification |
5、 Common Problems and Solutions
Insufficient adhesive strength of the glue: Check the opening time of the adhesive to avoid overtime construction;
Replace high viscosity adhesive (such as Bostik V700).
Roll edge raised: Increase the amount of edge glue applied and apply pressure with sandbags for 12 hours.